Perhaps you've seen hot air balloons for sale as science demonstrations/experiments that you fill up with hot air from a hair dryer and let float to the top of the room. This product can be easily recreated on a smaller scale with tissue paper. This project is a great way to demonstrate and learn about gases and density. You'll need: 5-6 sheets of tissue paper, a strip of paper, a glue stick, a marker, scissors, and a hair dryer. The first step is to layer 5-6 sheets of tissue paper and fold them in half lengthwise. Use a marker to draw a half tear drop shape. Cut along the line and unfold the layers. Each one will be a panel for the hot air balloon. Using a glue stick, or wet glue thinly applied with a paintbrush, glue one edge (marked in the picture above) and layer another panel on top. Pres down firmly to seal the edge. Once the glue has dried, unfold the two panels to inspect for any holes. Make sure to seal...
Update: (Please scroll down for step by step instructions of original Cardboard Opaque Projector) The updated Cardboard Opaque Projector is our attempt to increase the brightness of the light chamber inside the box and therefore the projected image. A box that is 16 x 12 x 12 inches allowed us to position the light source below the mirror and closer to the bottom of the projector and therefore closer to the image to be projected. Adding black construction paper inside the lens barrel is to help image quality by reducing glare from reflected light inside the cardboard tube. Lining the inside of the box with aluminum foil and using a light bulb reflector shade with a 7W LED light provided substantially more light as well. Due to the size of the reflector shade we had to manuever it in place behind the mirror and then screw the light socket holder onto it through the hole in the back. This is tedious but not overly so. This shows the image to be projected and the project...
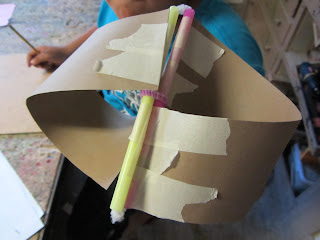
Materials: • Wide clean plastic cup or clear solo cup. • A straw • Skewers • Bottle caps • Foam core • Tape Tools: • Scissors • Hot glue gun • A wood screw • Phillips screw driver or pencil Automata meaning self operating machine typically consisted of a clockwork statue or scene and were first created centuries ago in Europe and Asia. They were in many ways the direct ancestor of what became electro mechanical robots. For our purposes automata are a good way to explore machine's function of converting one form of energy and motion into another. They are also a way to teach simple mechanical problem solving skills. Micro automata were the first in our series of attempts to simplify cardboard automata. The basic idea was to avoid building the box by putting the mechanism inside a clear plastic container. Mechanically they are very simple. They have a input shaft with a crank coming out the side and an output shaft coming out the top with a ...
 The wind tunnel was made using a variable speed electric fan.


