Camera Projector

Materials:
• 2” telescopic cardboard tubes (we got ours at www.uline.com : S-1634 kraft telescopic tubes, for smaller numbers check out your local shipping and packaging store)
• mat board or large popsicle sticks
• 1.75’’ plastic magnifying glass (we got ours from American Science and Surplus, www.sciplus.com , # 91581 plastic magnifier, these generic 2 lens magnifiers are available from many web sites but make sure they fit your tube before you order a lot of them from another source)
• white plastic grocery bags
•acetate sheets for slides (try to get these from an art store not a office supply store as they are much cheaper, alternatively any flat clear plastic from packing or flat sided bottle can also be used.)
Tools:
•fine tooth wood or hack saw and miter box
•box cutter
•scissors
•hot glue gun
•permanent markers
Preparing the tube and matt board: use a fine-toothed saw and a miter box to cut the telescopic tube into 6’’ lengths. Make sure both inner and outer tubes are cut evenly and that the ends are square, as this will affect function. Next cut these 6” pieces into one 3.25” section and one 2.75’ section. These lengths work well for the American Science and Surplus lenses (which have about a 3.25” focal length), but if you use different lenses you will need to change the length of the long segment so that it is near the focal length of your lens. The difference in the length can be added or taken out short segment, as its exact length is not important.


Next, take the inner long tube section, find the most squarely cut end and hot glue the magnifying glass on to the end of the tube. When the glue has set put the inner tube with the magnifying glass back in the outer tube.

Orient the parts as seen above with the plastic bag diffuser in the middle of the assembly.
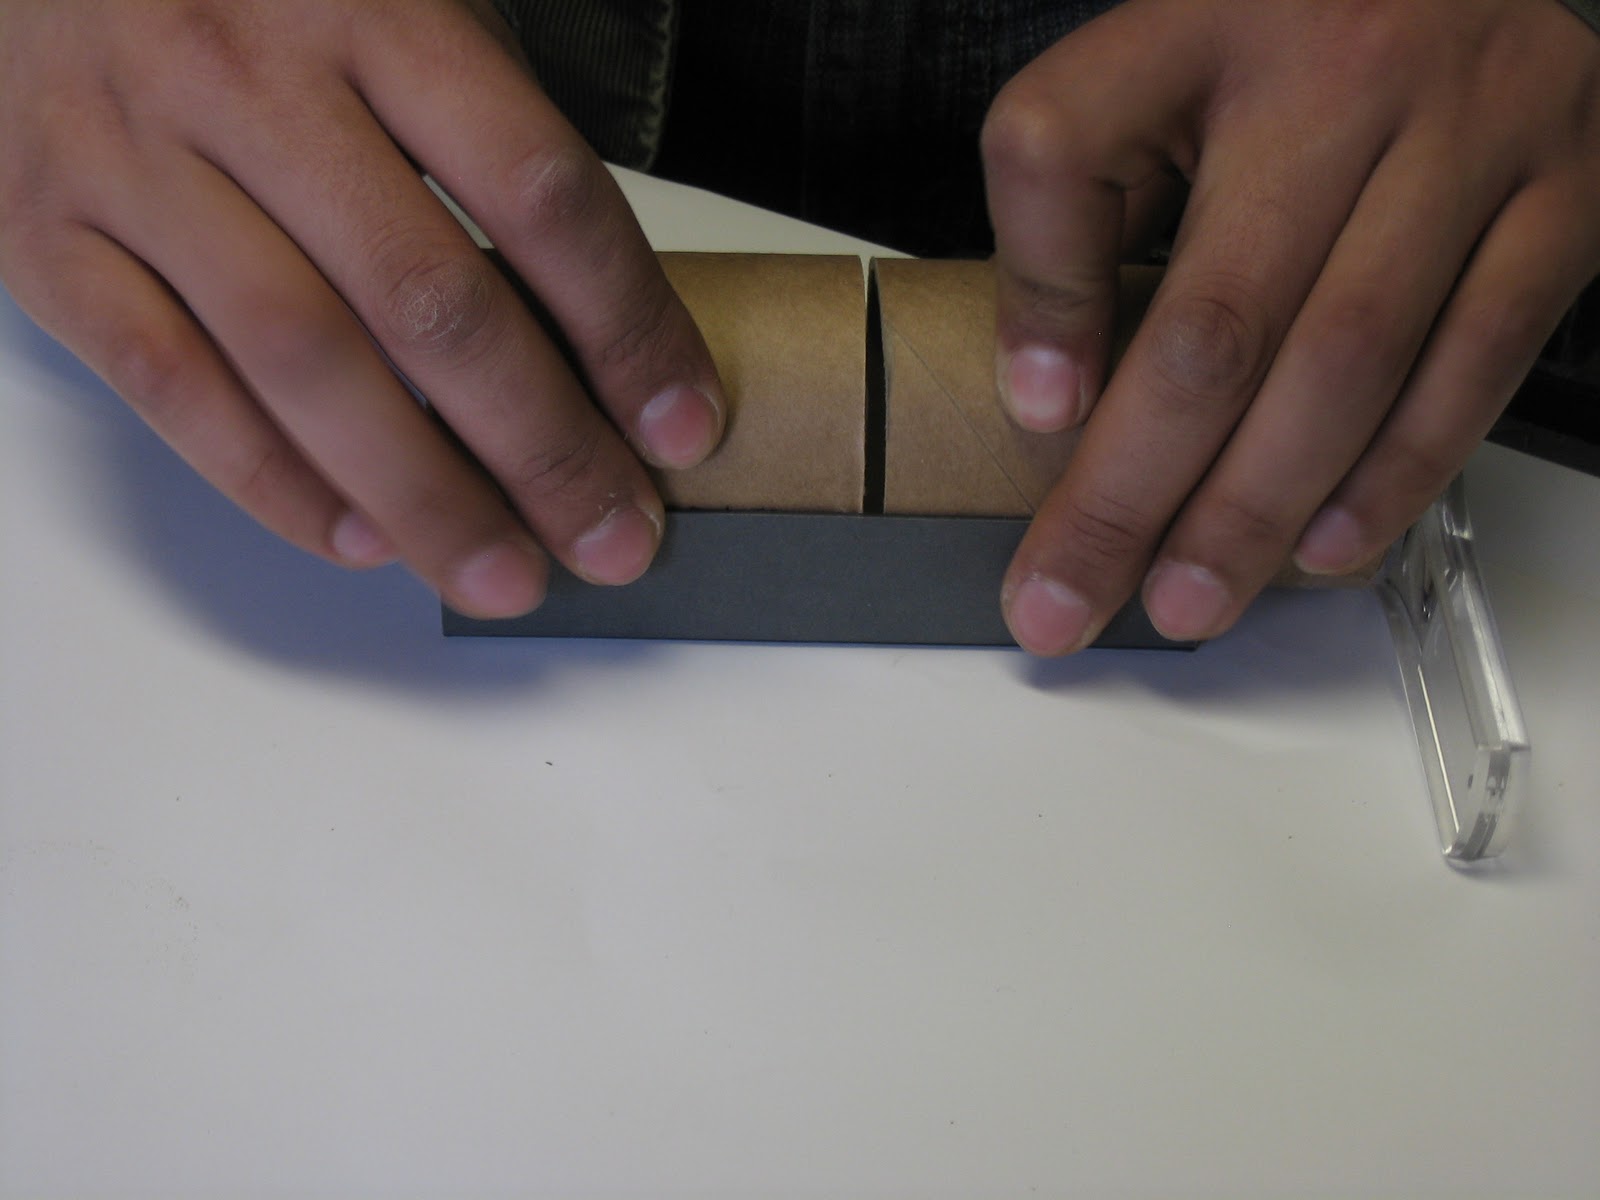
At this point you can either add a mat board “foot,” a 5”x4.125” piece with scoring in 1” from the long edges.

Alternatively, three large popsicle sticks can be used to hold the assembly together. In either case a gap of at least 1 mm should be left between the diffuser so a slide can be inserted into the projector.

To use the as a camera simply point the magnifying glass at a well lit area and a inverted image will appear on the diffuser. The quality of this image will depend on how closely you match the focal length of the lens to the distance between the lens and the diffuser. Though the lens can be slid in and out to somewhat adjust focus.

To use as a projector insert a slide (note the rounded shape) into the slot and shine a flash light into the back. Standard projector slide can be used or slides can be made by drawing on clear plastic with permanent markers. Again the lens can be slid in and out to adjust the focus. In a dimly lit room you can expect to get at least a 1-2’ image with a strong flashlight.
Things to do and notice:
Camera projectors are meant as a simple way to explore lenses and refraction. Lenses can gather light and form images, given their profiles cause light to converge. However, these images are always both upside down and backwards. Having students make their own slides reinforces this effectively because slides must be drawn upside down and backwards to appear normally. This is easily done by drawing the top of the image at the bottom of the slide (the curved part) and then flipping it so it faces backwards in the projector. Trying to project a word forward and right side up will make this clear. When projecting, Spherical Aberration can be seen. Spherical lenses bend light at different rates at their centers than at their edges, typically making it easy to focus the center of the image but nearly impossible to focus the edges. When used as a camera Chromatic Aberration can be seen when looking at bright light sources close up. Chromatic Aberration, the fact that different frequencies of light bend at different rates in a given substance (as seen in glass prisms), will cause bright lights to be ringed by a thin line of rainbow.
Note: this is a modified version of a project originally designed by Lawrence Hall of Science.


I think this is an informative post and it is very useful and knowledgeable. therefore, I would like to thank you for the efforts you have made in writing this article. Sony
ReplyDelete
ReplyDeletevé máy bay eva giá rẻ
Vé máy bay đi mỹ
korean air
khuyến mãi vé máy bay đi mỹ
đặt vé máy bay đi canada
Nhung Chuyen Di Cuoc Doi
Du Lich Tu Tuc
Tri Thức Du Lịch
Eastporters
ReplyDeleteBest prices on movie projector equipment in Canada. Projectors, Screens, Seating, Audio! Visit our Oakville, Ontario showroom or buy online, over the phone!
https://www.eastporters.com/
Best prices on movie projector equipment in Canada. Projectors, Screens, Seating, Audio! Visit our Oakville, Ontario showroom or buy online, over the phone!
ReplyDelete1193 North Service Rd W, Unit C7 Oakville, Ontario Canada L6M 2V8
info@eastporters.com
1 (888) 450-3050
https://www.eastporters.com/
Thanks for the great post check how to turn phone into projector
ReplyDelete